Sometimes you run across a situation where a digital image of a document is very dark. This isn’t necessarily a bad thing. But when you want to print it, that darkness uses a lot of ink or toner. It coats the paper with so much ink/toner that it’s wasteful and with ink, it can sometimes warp the paper. Plus, if you want to use the image for publication, it’s nice to have a cleaner version. Following are instructions on how to make your dark images lighter.
I use adjustment layers to edit images. An adjustment layer modifies an image without destroying the original image. With adjustment layers, you can make modifications, turn them “off” without losing them, or delete them and start over, all without modifying the original image.
For this particular type of modification, I adjust the Curves of the image. Curves deal with the tonal range of the image, allowing you to control light and dark areas. This technique gives you a little more control than using contrast/brightness or levels. There are various ways to lighten images, but this is the simplest way, especially since we are dealing with black and white documents.
Note: This technique can be used with most image-editing software, but for this demonstration, I am using Photoshop CS3.
Lighten Up Dark Images
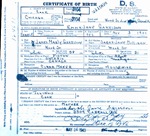
| Before | After |
 |  |
In the Layer menu, choose New Adjustment Layer, then choose Curves. In the New Layer pop-up window, click OK.

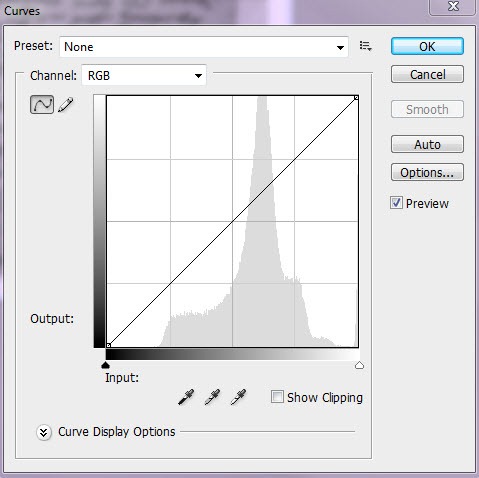
Adjust the curves. The initial Curves dialog box appears as follows:

Note the diagonal line; the bottom-left point represents black, while the top-right point represents white. Other points can be added along the line to control midtones. Because we are trying to get as close to a true black and white image as possible, I do not add additional points in the midtone range (this does become important when dealing with photographs). So for our purposes, we are really only concerned with adjusting the black and white points. Until you get the hang of it, this can be a bit of guessing game. Typically though, for our purpose of lightening a dark, black and white image, you want to push the light and dark into the midtone range along the x axis (horizontal).
The resulting adjustment (used for the example image above) is as follows:

In this case, I also adjusted the points a little bit along the y axis (vertical). The result is basically eliminating the gray that covered the original image.
Invert White on Black Images
Another issue we often see is white text on black or a negative image. For these types of images, we will use the same process above, except we will add another step.
| Before | Invert | After |
 |  |  |
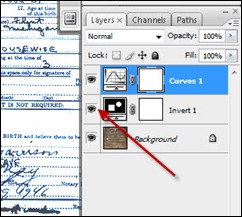
Before you adjust the curves, you need to invert the image. From the Layer menu, choose New Adjustment Layer, then choose Invert. In the New Layer pop-up window, click OK.

Your image is now inverted. It may be that no further adjustment is needed. But in the example above, there is a lot of gray, making the image dark. Continue on by following the steps for Lighten Up Dark Images above.
Saving The Images
You should keep the resulting file, saving it as a Photoshop (.psd) file or a TIFF (.tif) file, either of which includes the original image as well as the adjustments. This way, if you ever want to make additional changes, or if you need the original image, you have the native file with the original image and the layers. Do note that this file is much larger than saving it as a JPEG (.jpg) file, but it does maintain the integrity of the original, whereas the JPEG is a compressed file.
Note: To get back to your original image, simply turn of (uncheck) the layers.
| Layers On | Layers Off |
 |  |
I hope this helps you with those dark images you have acquired. I know it saves me a lot of ink!


4 comments:
Julie, This is one of the best things I've learned. Thank you so much, your detailed instructions were perfect.
It looks nicer too Julie! Thank you for this, I just may need to do this!kebro
Great to know! I've tried this before by adjusting the brightness level, but that lightens the words as well as the background. This is much better!
This is really helpful information, especially for someone like me who is new to editing images. Thank you for sharing your knowledge.
Post a Comment